DEVELOPING-TRAYS are made of many different materials. Paper, wood fiber, glass, porcelain, and hard rubber trays are usually kept on hand by dealers in photographic stock. If you prefer to buy your trays, those made of hard rubber will be found the most serviceable, though they are rather expensive and very fragile. Common granite-ware baking-pans will serve almost as well. This ware is both cheap and strong; and while the enamel remains intact, chemicals have no effect on it. But it must not be used after the enamel becomes broken, and the iron is exposed.
There are almost as many different ways of making homemade trays as there are persons who make them. The most simple is to dip a shallow pasteboard box of appropriate size into melted paraffin, to make it impervious to water. Such trays answer the purpose in an emergency, but they do not last long. The kind most commonly used is made by lining a suitable wooden tray with common oilcloth. The oilcloth is not cut at the corners, but is simply folded. It may be glued to the inside of the tray, or overlapped at the edges, and fastened to the outside with tacks.
The best trays I ever used were made of wood coated with paraffin. The cost of such trays is almost nothing, and they are not difficult to make. I have used trays made of almost every available material, but I never used one that did not have some drawbacks. Those I am about to describe are heavy, and can not be used for hot water; but unless one is moving often, the weight is hardly a drawback, and the amateur will seldom, if ever, have occasion to use hot solutions in his trays. The dimensions of trays will depend on the size of plates used.
Three should be made large enough to hold two plates, with half an inch to spare each way. If you have a five-by-seven-inch camera, the inside measurement of your trays should be seven and a half by ten and a half inches. They should be labeled, respectively, “Developing,” “Toning,” and “Miscellaneous.” The developing and toning trays should never be used for any other purpose. Another tray, large enough to hold four plates, and labeled “hypo.,” should be made. I will give instruction for making a tray of the size first mentioned; and if the reader decides to make another size, the dimensions may be proportionately changed.
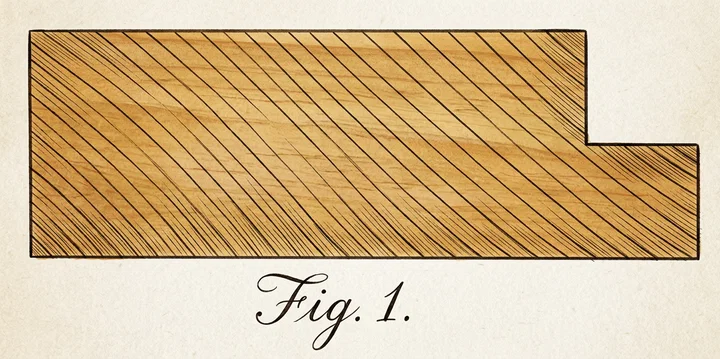
Procure a one-by-three-inch board of some light, soft wood, and plane both sides and edges perfectly smooth and straight. Along one edge of the board make a half-inch rabbet, or groove. Figure 1 shows an end section of this board, reduced to half-size. From this board cut two pieces twelve and a half inches long and two eight and a half inches wide. Make a half-inch rabbet across each end of all these pieces. Now with one-and-a-half-inch finishing nails fasten these four pieces into a frame. Fit the short pieces on the inside, so as to make the dimensions of the tray come out right. If the long pieces are fitted on the inside, the inside measurement of the frame will be six and a half by eleven and a half inches. This frame makes the sides of the tray. For the bottom use a half-inch board eleven and a half inches long by eight and a half inches wide. This, you will observe, is one inch larger each way than the inside of the tray; but as half an inch has been removed from each side and end by the rabbeting plane, it will be found a perfect fit. A board from the side of some dry-goods box will serve for this bottom piece. It should be planed smooth on both sides; and if there are any nail holes in it, they should be filled with small wooden pegs.
If the tray has been carefully made, it will be water-tight; but if it should leak a little, it will not matter, so nothing will be gained by trying it. There are many methods of making wooden trays impervious to chemical solutions; but the best is also the cheapest and most simple, so I will give only that one.
Place the tray near a gentle heat until it is warm to the touch; then give it a generous coat, inside and out, of melted paraffin. The paraffin may be applied with a paint-brush, or with a swab made by wrapping a clean cotton cloth around the end of a stick. If the tray was not sufficiently heated to take up the wax readily, it may be “burned” in with a moderately hot smoothing-iron.
Trays may be made on this plan by simply nailing smooth pieces of board together, just as a dry-goods box is made; but they will not look as neat, nor are they as substantial, as when the pieces are neatly rabbeted and fitted together.
Besides the four trays already mentioned, it would be well to make a washing-box. This is not absolutely essential, as the plates may be washed in the “miscellaneous” tray, or in any other available vessel.
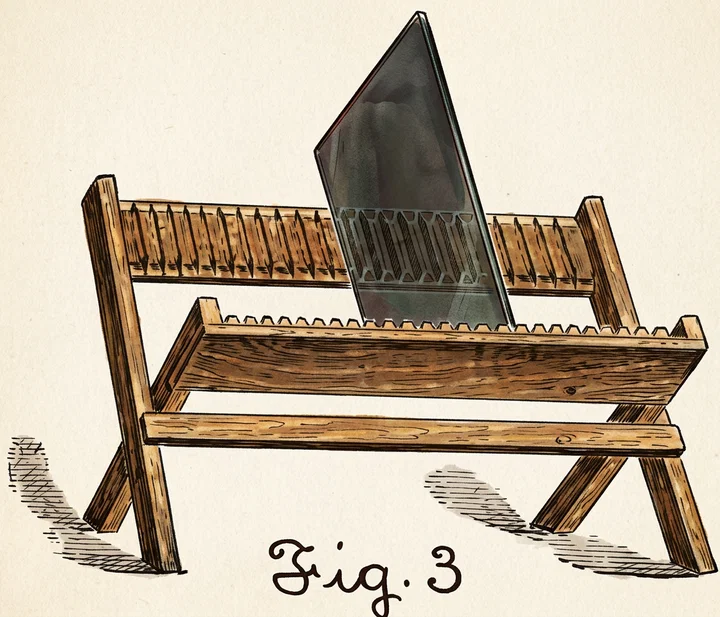
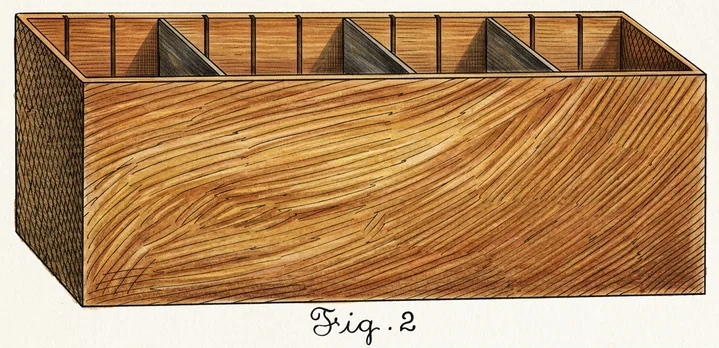
The washing-box should be made on the same plan as the trays; but for five-by-seven inch plates, the inside dimensions should be as follows: length, eight and three-fourths inches; width, five and three-sixteenths inches; depth, eight inches. Before the box is nailed together, strips of wood eight inches long, half an inch wide, and one fourth of an inch thick, should be tacked to the inside of both side-pieces, exactly three sixteenths of an inch apart. A lath “ripped” to the proper width, and planed, is just the thing for the strips. Thirteen will be required for each side; and when the box is finished, they will make twelve grooves along each side, into which the plates may be slid lengthwise, to be washed in an upright position. It will be impossible to use a smoothing-iron to coat the washing-box, so it must be heated to a temperature above the melting-point of paraffin before the wax is applied. Figure 2 shows a washing-box containing sixteen grooves. A simple drying-rack, which may be made without other description than the illustration gives, is shown in Figure 3. It will be found a convenient addition to the outfit. J. EDGAR ROSS.