HOW TO MAKE A BATTERY

7%

Review and Herald Publishing Company · Chicago; Battle Creek, Michigan; Atlanta · Apr 6, 1899

FromThe Youth’s Instructor, Vol. 47, No. 14.

Read the full edition

HOW TO MAKE A BATTERY.

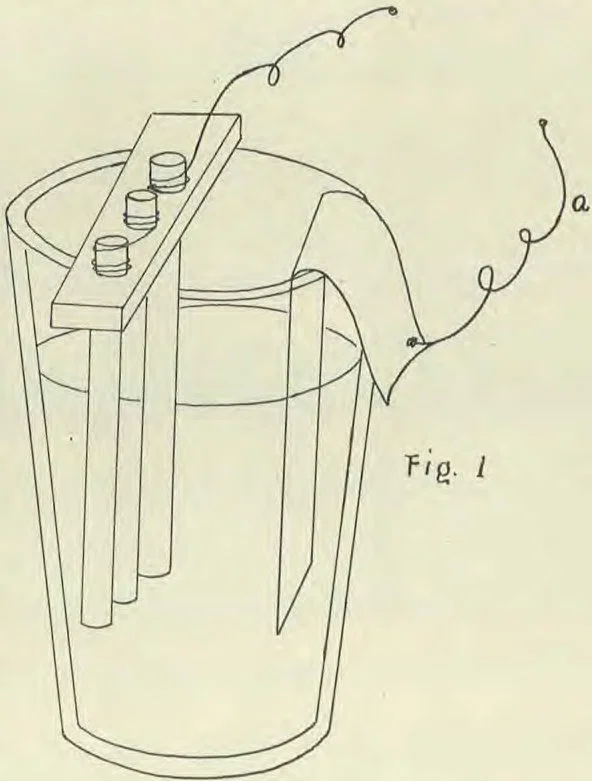
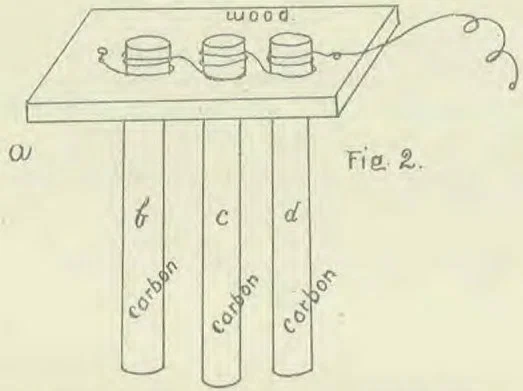
To make an electric battery, we must have, first, some way of producing a current. There are several ways, but the easiest is to use chemicals. Take a glass tumbler two-thirds full of water, as shown in Fig. 1, and two or three pieces of carbon pencils, such as the man who cleans and renews the electric lamps throws away. If you can not get these, a strip of copper two inches wide and five inches long will answer the purpose. Now take a piece of box-board, or any thin board, and cut out a strip (a, Fig. 2) an inch and a half wide, and long enough to go across the top of the tumbler. Next bore three holes through this strip, into which the carbon pencils (b, c, d, Fig. 2) will fit tightly around each pencil, leaving one end about six or eight inches long. This wire will keep the pencils from dropping through the strip of board, and also serve to carry the current. Would it pass over a string?—No; electricity likes a metal path best. It will sometimes take some other path, but not if it can find a metal path.
Fig. 1
Fig. 1
Now we have one element of our battery. The chemicals that we will put in the tumbler will not act on the carbon; so it is called the negative, or not working, element.
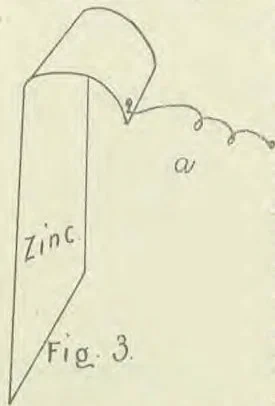
But one element will not make a battery; what shall we do now? We must have one that the chemicals will act upon. The best metal for this purpose is zinc. This is known as the positive element. A strip of zinc (Fig. 3) an inch and a half wide and five inches long will be about right. Bend the end over so it will rest on one side of the glass, and fasten a wire (a, Fig. 3) on it for a conductor.
Fig. 2.
Fig. 2.
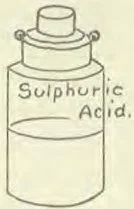
Both elements of the battery are now ready; so we will pour about two tablespoonfuls of sulphuric acid into the water in the tumbler. Do not measure it in a spoon; for it will spoil the spoon. You can guess near enough; but do not get in too much, or the solution will be too strong. This acid is very strong and poisonous, and will burn almost everything it comes in contact with; so be careful not to spill any, or get it in your mouth or on your fingers, wash it off at once with soap and water.
Fig. 3.
Fig. 3.
Now put the elements in the tumbler, as shown in Fig. 1. If we bring the ends of the wires (a and e, Fig. 1) together, and then separate them, we shall see a tiny spark; this shows that we have an electric current; but as long as the wires are separated, no current will be produced. You see the current acts with much more wisdom than do many persons; for it never starts out on a journey till there is a way for it to get home again. It does not go wandering around, not knowing where. It waits till there is a definite path for it to travel over; then it goes ahead, does its work, and comes back quickly.
Watch closely where you have the ends of the wire connected, and you will see small bubbles on the carbon in the battery. They are bubbles of hydrogen gas, which are set free by the action of the acid on the zinc. When these bubbles cover the carbons, no more current will pass; for it can not get through this gas; so we shall have to shake the pencils to make the bubbles rise.
Fig. 4.
Fig. 4.
The current starts from the zinc beneath the liquid, goes over to the carbon, then out over the wires, and back to the zinc. Since the current starts out over the wire from the carbon, this is called the “positive” pole; and as the current goes in at the zinc, it is called the “negative” pole.
This completes our battery. Make two or three of them before our next study, so you will have current enough for our experiments.
V. L. HOWARD.