So many of the young people of the INSTRUCTOR have made and are using the simple little enlarging instrument I described in the INSTRUCTOR of Dec. 13, 1904, that I will describe for them still another useful contrivance. This is also a drawing-machine, but it is larger, and is designed for use on the blackboard. How often we have seen some busy day-school or Sabbath-school teacher spend half an hour or more drawing a simple little picture on the board. It should have taken five minutes, perhaps ; but this line went wrong, and had to be redrawn, and then another line was wrong, and so on till the hour was gone, and the picture not a very great success even then.
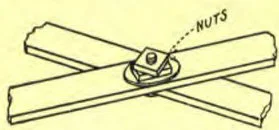
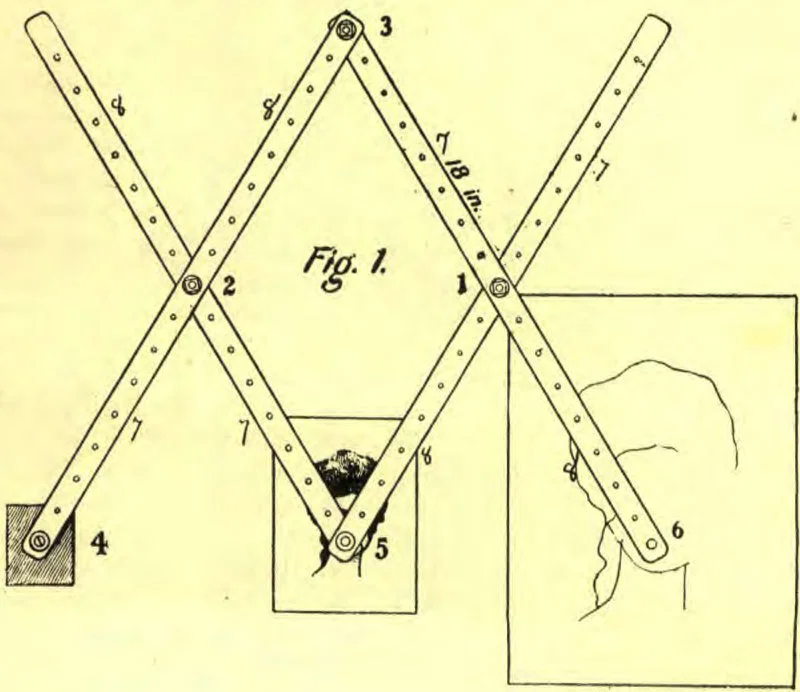
Joints 1 and 2
Now, let us all see how helpful we can be in overcoming this difficulty by constructing the simple drawing-machine which we will now describe. If careful attention be given to a few points, the home-made pantograph, as it is called, will do as good work as one costing five or even ten dollars.
Four bars of wood are needed for the frame. If you can get hard wood for the bars, that is the thing to do. You may make them large or small, but 36 x ½ x ⅜ inches is the commonly approved size where soft wood is used. Plane them smooth and square.
Bore holes in the bars an equal distance apart, two or three inches, and take special care to have them all in exactly their correct measured distance; don’t guess at it; for as I told you in describing the small pantograph, the opposite bars must work parallel to each other, or the copy or enlargement will be a distortion. The bars will work parallel if the holes are made right.
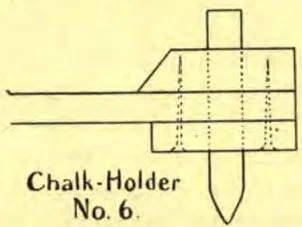
Chalk-Holder
No. 6.
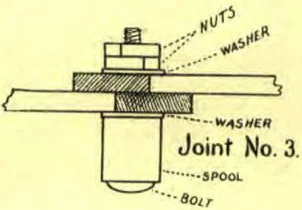
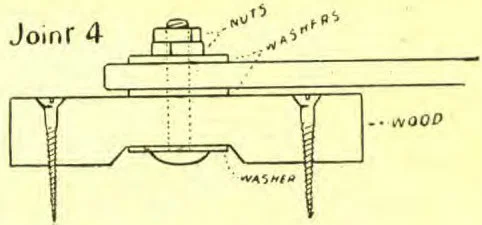
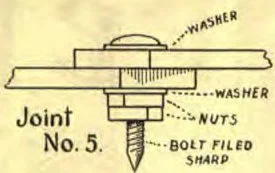
I have illustrated the joints that you will need. They are so designed as to be easily made, and yet they work smooth and true, and wear well. Notice that the principal feature is a short bolt, and that two washers and two nuts are used on each bolt.
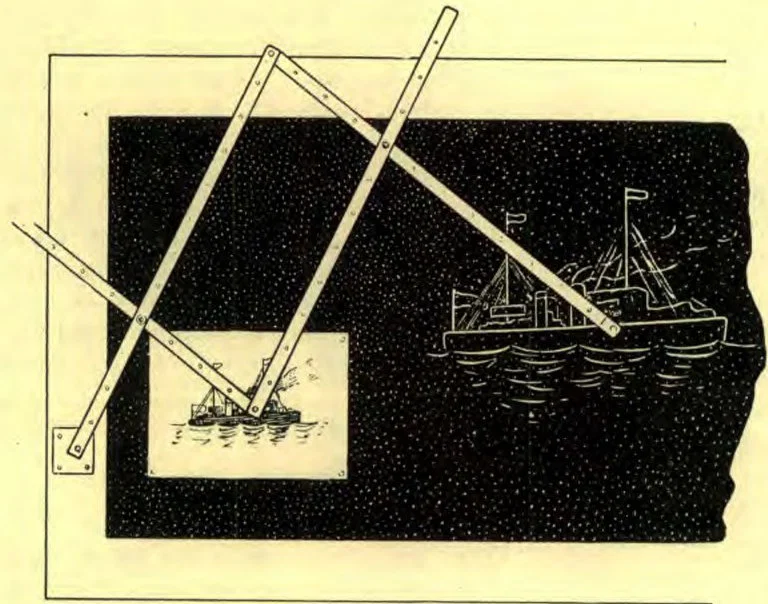
HOW IT IS USED
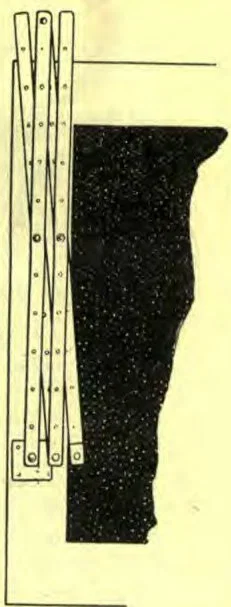
NOT IN USE
One nut acts as a lock-nut, to keep the joint from loosening or tightening while in use. Simply screw the first nut down on the washer till the joint is tight enough, then screw the second nut down on the first tightly, to lock it, and keep it from turning. Be sure to make the holes in the bars so that they just fit the bolts; for they must not be loose and wabbly.
Joint 3 is so arranged that the smooth head of the bolt glides over the blackboard without catching and jerking. If it should leave a mark on the board, a small piece of cloth may be tied over the bolt head so that the cloth instead of the metal will rub.
Joint 4 is the support of the pantograph. We have made it stronger than we did in the little instrument, because here it has a greater strain upon it. The block of wood to which it fastens is screwed to the wall on one side of the blackboard; thus it folds to one side when not in use, and is in no wise in the way.
Joint 5 has a longer, sharpened bolt, called a tracer, because it traces the outline of the original picture. In drawing, the operator does not watch his chalk crayon at all, but leaves it to take care of itself while he gives the closest attention possible to the tracing point. The tracer can easily be made sharp with a file, but it should have a smooth point that will not tear.
The chalk holder is fully described by the diagram. Keep the chalk well sharpened with a knife. If it fits too loosely in the holder, wrap it with a strip of paper.
The cost of making the pantograph should not exceed ten or twenty cents, especially if the wood bars can be made from something you find at home. Four good, straight-grained laths have been successfully used as bars.
Fig. 1.
How to Use a Pantograph
It is somewhat puzzling to a person unacquainted with the instrument to know how to use the pantograph, such as we have just described, for the purpose of copying or enlarging. I will therefore try to explain the difficult point.
Under the tracing point is tacked a picture to be copied. Your hand grasps the crayon or pencil, 6, and marks with it, while the eye watches carefully the motion of the tracing point. Don’t watch the pencil, but keep the tracing point on the lines that are to be copied.
Suppose you wish to make a large picture from a small one; all that you need to do is to change joints 1 and 2. For instance, you use the four holes marked 7 on the diagram. Don’t you see that will bring the point 5 nearer to 4, and at the same time put the pencil, 6, farther away, thus increasing the leverage, so that while the tracing point moves just a short distance, the pencil will move a long way, and of course make a long mark. Now, if you used the holes marked 8 for the joints, that would bring the tracing point and pencil quite close together, and the pencil would not move very much more than the point; and so there could not be much enlargement. Thus by using different sets of holes, different degrees of enlargement may be produced. Remember one thing always, and that is to keep the opposite bars of the pantograph parallel. I hope that many will find both pleasure and profit in the making and the using of the pantograph, for it certainly is a time- and labor-saving device.